Beranda
/ Laying Backsplash Tile / Installing A Tile Backsplash : Laying out a tile backsplash.
Laying Backsplash Tile / Installing A Tile Backsplash : Laying out a tile backsplash.
Insurance Gas/Electricity Loans Mortgage Attorney Lawyer Donate Conference Call Degree Credit Treatment Software Classes Recovery Trading Rehab Hosting Transfer Cord Blood Claim compensation mesothelioma mesothelioma attorney Houston car accident lawyer moreno valley can you sue a doctor for wrong diagnosis doctorate in security top online doctoral programs in business educational leadership doctoral programs online car accident doctor atlanta car accident doctor atlanta accident attorney rancho Cucamonga truck accident attorney san Antonio ONLINE BUSINESS DEGREE PROGRAMS ACCREDITED online accredited psychology degree masters degree in human resources online public administration masters degree online bitcoin merchant account bitcoin merchant services compare car insurance auto insurance troy mi seo explanation digital marketing degree floridaseo company fitness showrooms stamfordct how to work more efficiently seowordpress tips meaning of seo what is an seo what does an seo do what seo stands for best seotips google seo advice seo steps, The secure cloud-based platform for smart service delivery. Safelink is used by legal, professional and financial services to protect sensitive information, accelerate business processes and increase productivity. Use Safelink to collaborate securely with clients, colleagues and external parties. Safelink has a menu of workspace types with advanced features for dispute resolution, running deals and customised client portal creation. All data is encrypted (at rest and in transit and you retain your own encryption keys. Our titan security framework ensures your data is secure and you even have the option to choose your own data location from Channel Islands, London (UK), Dublin (EU), Australia.
Laying Backsplash Tile / Installing A Tile Backsplash : Laying out a tile backsplash.. This process requires no demolition, and the results are astounding. Aside from the fact that tiles vary widely in size and shape, the height of the backsplash, placement of electrical outlets, whether there is a window or not, and how the tile will terminate at either end of a run are all considerations. A kitchen backsplash is a great way to add value and style to the kitchen space. As i pointed out recently we're going to be writing several articles about how to install a tile backsplash for kitchens. Let's break down the process for grouting backsplash:
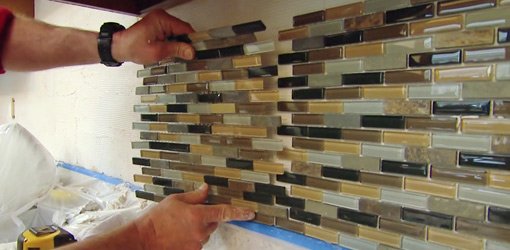
Let's break down the process for grouting backsplash: Keep in mind that t. 1) prepping the wall, 2) creating a layout, 3) attaching the tiles, and then 4) applying the grout and finishing. We scooped the mastic out of the bucket using a trowel and slathered it on the wall where the tile will go. Hold the tiles against the wall at the bottom of the backsplash area and move them hand over hand up the wall following your desired pattern until you get to the top.
How To Install A Mosaic Tile Backsplash Today S Homeowner from todayshomeowner.com Use your pencil line and bubble level to line the tile up in the middle of the backsplash, before pushing it into the mastic. The backsplash space between a countertop and wall cabinets usually can be filled with two or three horizontal tile rows, depending on the size of your tiles. Here's how to install a tile backsplash in your kitchen. Make sure the tile is lined up properly and perfectly straight before moving on. Lay out your backsplash tile design. This process requires no demolition, and the results are astounding. Handyman to grout tile backsplash like a pro … steps for grouting backsplash. Ask this old house general contractor tom silva teaches a homeowner a simple technique for tiling backsplash.subscribe to this old house:
Useful in the kitchen and bathroom, backsplash tile is commonly installed around countertops, sinks and stove areas.
No two tile backsplash projects will lay out the same: Hold the tiles against the wall at the bottom of the backsplash area and move them hand over hand up the wall following your desired pattern until you get to the top. Before you begin tiling, check out the existing surface you'll be working on. A tile backsplash in the kitchen may be applied over clean, level drywall since sinks aren't considered wet areas, like showers, that require backer board. As i pointed out recently we're going to be writing several articles about how to install a tile backsplash for kitchens. You may find you have to start with. Also, remember that using the correct trowel and mortar are critical to a successful tile project. Useful in the kitchen and bathroom, backsplash tile is commonly installed around countertops, sinks and stove areas. Unroll the adhesive mat and cut it to fit the backsplash space, using utility scissors or a utility knife. Many times when you tile a backsplash the material that you will be mounting it onto will determine the specifics of the project. How to install subway tile in your kitchen with tips and tricks for a flawless installation. How to install a simple subway tile kitchen backsplash. Paint is one of the cheapest decorating materials you can use to redo a backsplash.
This process requires no demolition, and the results are astounding. Adding decorative tiles to the lost space found between the countertops and upper cabinets can give your kitchen a whole new look. Glass tile is a favorite material for backsplashes because of its beauty, versatility, and durability. Before you begin tiling, check out the existing surface you'll be working on. Check the tile size against the wall and sand rough edges with sandpaper or a pumice stone.
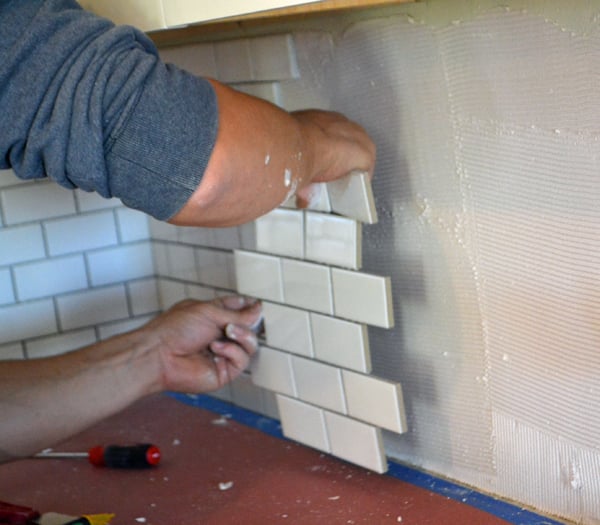
Subway Tile Backsplash Install Ana White from ana-white.com The following will walk you through the four stages of installing a tile backsplash: Set the tile in the cutter and adjust it to the desired measurement. If not, consider installing a tile backer board first. Remove the protective film from one side and stick the mat to the wall, pressing and smoothing the surface to achieve a good bond. Work your way outward and upward from there. Place the tile across the wall and mark your starting and end points. Use your pencil line and bubble level to line the tile up in the middle of the backsplash, before pushing it into the mastic. Let's break down the process for grouting backsplash:
A brother of limestone, travertine has rustic appeal that can work in a number of kitchen tile backsplash designs.
This process requires no demolition, and the results are astounding. A straightedge or level can help you keep the tile even. The type of grout you should use largely depends on the gap size between tiles. As i pointed out recently we're going to be writing several articles about how to install a tile backsplash for kitchens. This is a very standard project that requires some tiling skills and tools like a tile cutter. Let's break down the process for grouting backsplash: We scooped the mastic out of the bucket using a trowel and slathered it on the wall where the tile will go. This kitchen backsplash idea from ' martha ' will take your plain jane white tile backsplash into custom look territory! One of the projects in a kitchen remodel is to install tile for a backsplash behind the sink. Our first article focused on selecting a tile backsplash so for this article i'd like to discuss how to lay out a tile backsplash. Before you install a backsplash, try walking tiles up a wall to make sure you aren't left with a thin sliver where the tile meets cabinetry. Before you begin, watch what's inside my wall? Place the tiles gently and remove them quickly if you put them in.
This kitchen backsplash idea from ' martha ' will take your plain jane white tile backsplash into custom look territory! Work your way outward and upward from there. A tile backsplash in the kitchen may be applied over clean, level drywall since sinks aren't considered wet areas, like showers, that require backer board. Also, remember that using the correct trowel and mortar are critical to a successful tile project. Place the tile across the wall and mark your starting and end points.
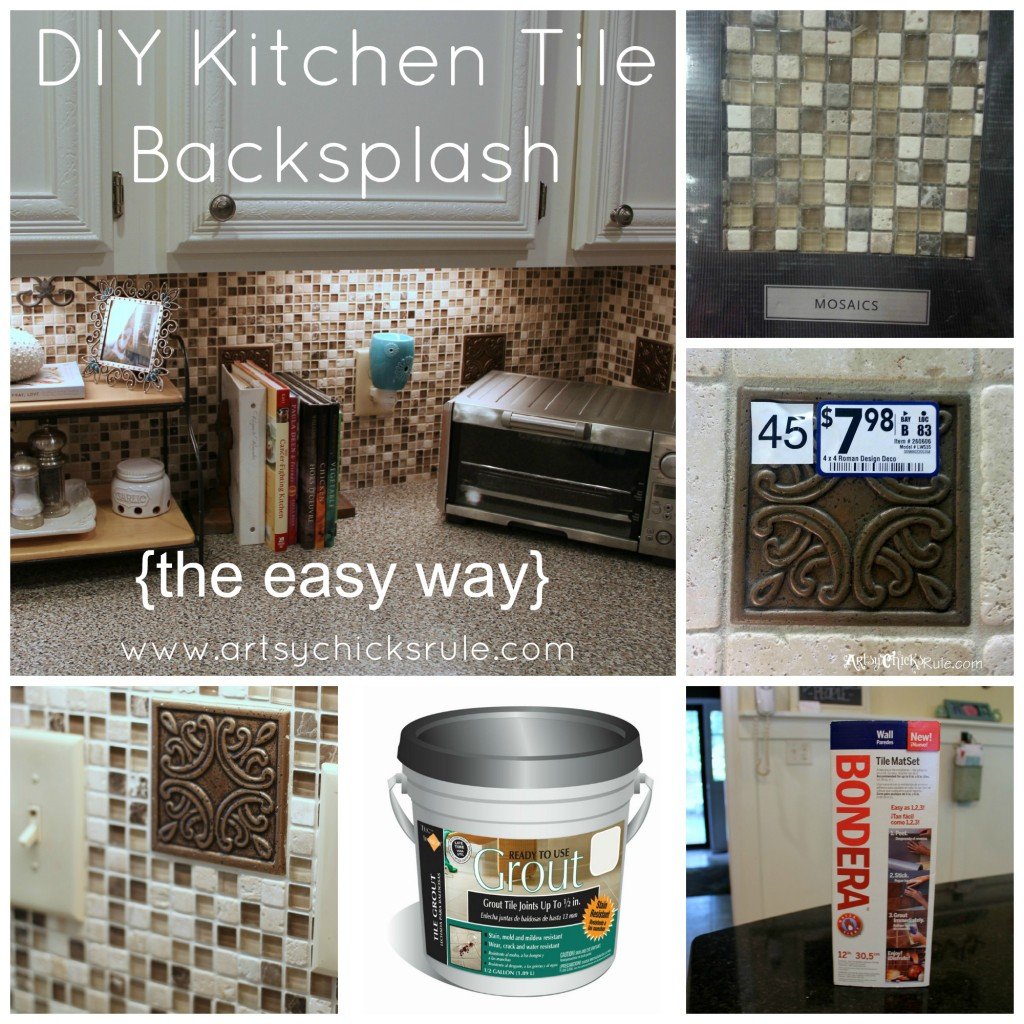
Kitchen Tile Backsplash Do It Yourself Artsy Chicks Rule from www.artsychicksrule.com Installing backsplash tile when it comes to hanging the backsplash tile on the wall, it's actually pretty easy as long as it doesn't require a special cut. A tile backsplash is a great way to change the look and feel of your kitchen. A tile backsplash in the kitchen may be applied over clean, level drywall since sinks aren't considered wet areas, like showers, that require backer board. Keep in mind that t. The backsplash space between a countertop and wall cabinets usually can be filled with two or three horizontal tile rows, depending on the size of your tiles. This is a very standard project that requires some tiling skills and tools like a tile cutter. The following will walk you through the four stages of installing a tile backsplash: Before you begin, watch what's inside my wall?
The following will walk you through the four stages of installing a tile backsplash:
In a perfect world that backsplash would be a length that. A tile backsplash is a great way to change the look and feel of your kitchen. We scooped the mastic out of the bucket using a trowel and slathered it on the wall where the tile will go. The first tile will make the base for the rest of your backsplash, so it needs to be placed perfectly. Keep reading to learn the tips and eight easy steps you need from mr. Handyman to grout tile backsplash like a pro … steps for grouting backsplash. Our first article focused on selecting a tile backsplash so for this article i'd like to discuss how to lay out a tile backsplash. The backsplash space between a countertop and wall cabinets usually can be filled with two or three horizontal tile rows, depending on the size of your tiles. The following will walk you through the four stages of installing a tile backsplash: The process for installing backsplash tile using adhesive tile mats is fairly straightforward. 1) prepping the wall, 2) creating a layout, 3) attaching the tiles, and then 4) applying the grout and finishing. When tiling a backsplash, the first thing to do is decide on a particular design and layout. Unroll the adhesive mat and cut it to fit the backsplash space, using utility scissors or a utility knife.